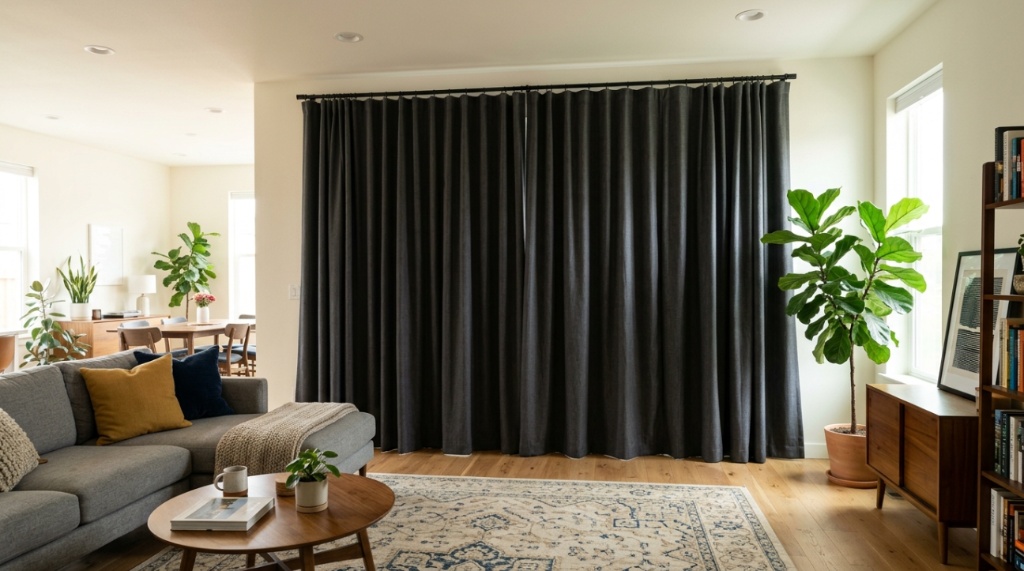
There’s nothing quite like a wall of glass. Sliding patio doors flood your living room with natural light and give you an open view of your backyard. But that same expanse of glass becomes a headache the moment the afternoon sun turns your couch into a sauna, or when a streetlamp beams directly into your bedroom at 2:00 AM. Standard curtains rarely solve this because they flap in the breeze, leave massive light gaps at the edges, and snag on the door handle every time you slide the panel open. The solution requires specific hardware, specific panel widths, and a clear understanding of how light actually leaks around sliding doors. This guide walks you through exactly how to measure, what materials actually block light, and which hanging method will survive daily use. If you are looking for a curated selection of top-rated options, you can explore some of the best blackout curtains sliding glass doors to see what fits your setup.
Key Takeaways
- Sliding doors require curtains that are 1.5 to 2 times the width of the door track to ensure full coverage when drawn, preventing light leaks at the edges.
- Opt for a ceiling-mounted track system with a return bracket to close the gap between the curtain and the wall, which is critical for true blackout performance.
- Choose grommet-top or back-tab curtains for easier sliding, but understand that a layered approach (curtain + valance or cornice) is often necessary to block light seeping over the top of the rod.
- Thermal-backed blackout panels do more than darken a room; they significantly reduce heat transfer, keeping rooms cooler in summer and warmer in winter.
- Measure the actual width of the sliding door frame, not the glass, and always add extra width (at least 8–12 inches) for stacking space on both sides.
Why Regular Curtains Fail on Sliding Doors
The fundamental problem with sliding doors is the mechanics. A sliding door moves horizontally, while a standard curtain rod has a fixed finial on each end. When you open the curtain to access the door, the fabric bunches up on one side and often covers the handle. When you close it, the fabric rarely sits flush against the frame because the rod ends block it. This creates the classic “hourglass” gap in the middle and light bleeding at the top and bottom.
Another common issue is width. Most people buy a single standard-sized curtain panel (around 50–60 inches wide) for a 72-inch door. That panel stretches tight when closed, leaving gaps at the edges. The fabric needs to be gathered, not taut. For a 72-inch sliding door, you need a total fabric width of roughly 108 to 144 inches—which means multiple panels or extra-wide curtains. Without that extra fabric, the curtain acts more like a blind spot than a blackout solution.
Different Types of Blackout Curtains for Sliding Patio Doors
All blackout curtains are not created equal. The term “blackout” refers to the fabric’s ability to block light, but the way that blocking is achieved varies, and that variation affects durability, heat retention, and how the curtain feels in your hand.
Triple-Weave Blackout Fabric
This is the gold standard. Triple-weave fabric has three layers of tightly woven fibers that sandwich a light-blocking core. There is no PVC coating, which means the fabric remains breathable, soft to the touch, and can be machine washed without cracking or peeling. These curtains typically block 95–99% of light. They also provide excellent thermal insulation because the dense weave traps air.
Coated (PVC or Acrylic) Blackout Fabric
These are usually cheaper. A layer of acrylic foam or PVC is applied to the back of a polyester fabric. They block light very effectively and are often heavy, which helps them hang straight. However, the coating can degrade over time, especially if exposed to direct sunlight and heat, causing the fabric to stiffen, crack, or emit a strong odor in hot weather. If you are on a budget, these work, but expect to replace them sooner.
Thermal/Suede-Back Curtains
These have a thick, suede-like foam layer bonded to the back. They are excellent for insulation and deadening sound, making them a great choice for rooms facing a busy street. The downside is weight—these curtains can be quite heavy, so you need a sturdy rod or track. They can also make the room feel darker and quieter, which is a pro for bedrooms but might feel too heavy for a bright living room.
How to Measure for Sliding Door Curtains
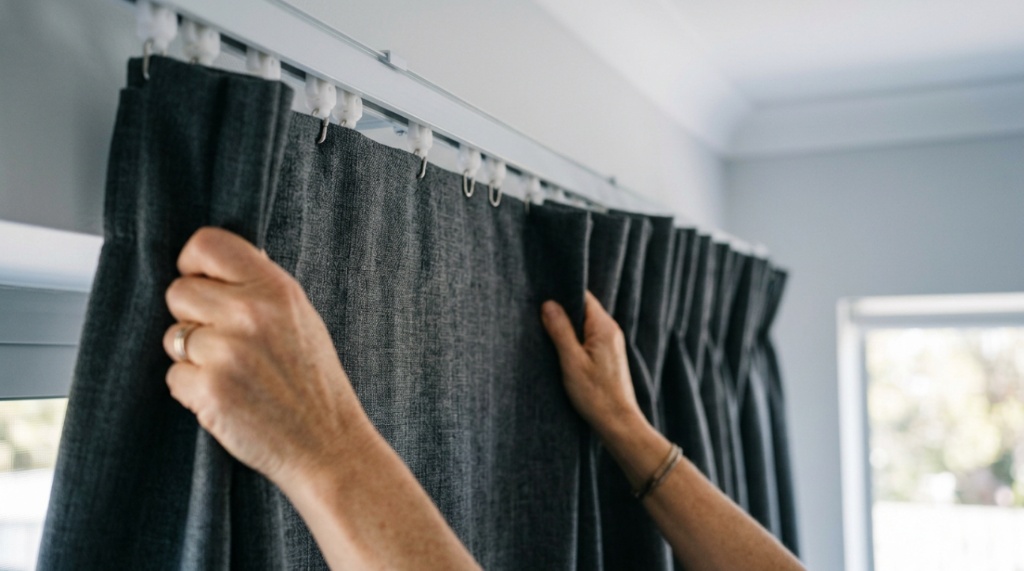
Accurate measurement is more important than fabric choice. A mismeasured curtain will leave a 1-inch gap that ruins the entire blackout effect.
- Measure the frame width: Measure the full width of the outer door frame. Do not measure just the glass. Write this number down.
- Add stacking space: You need space on both sides of the door for the open curtain to stack. Add 8–12 inches to each side. If you have wall space, use it. This is where the curtain will sit when the door is open, and it prevents the fabric from blocking the glass.
- Calculate total width: Take the frame width and add the side allowances. For a standard 72-inch door, your total width should be around 88 to 96 inches. This is the width your curtain rod/track MUST cover.
- Determine fabric fullness: The total rod width is not the same as the fabric width. To get the proper gathered look and full coverage, your fabric width should be 1.5 to 2 times the rod width. For a 96-inch rod, you need 144 to 192 inches of fabric. This usually means buying two or three panels and hanging them on one track.
- Measure the height: Measure from the top of the track/rod down to the floor. For a true blackout, the curtain should puddle slightly (1–2 inches) on the floor or hover just 1/2 inch above it. This prevents light from leaking under the bottom.
Choosing the Right Hanging Method
The rod you choose will dictate how well the curtains function and how much light leaks. For sliding doors, the standard tension rod or decorative rod with finials is usually inadequate.
Ceiling-Mounted Track Systems
This is the best solution. A ceiling-mounted track, similar to what you see in hotel rooms, runs the entire width of the wall. It allows the curtain to wrap around the corners on return brackets, sealing the light gaps at the sides. Because the track is mounted to the ceiling, there is no top gap where light can spill over the rod. The curtains glide effortlessly along the track on small gliders, which makes opening and closing a sliding door much easier than pulling fabric over a fixed rod.
Wall-Mounted Curtain Rods
If you prefer a rod, choose a heavy-duty steel rod with a diameter of at least 1 inch. Avoid finials at the ends that stick out too far, as they block the curtain from sliding all the way to the wall. The best setup is a rod that extends past the frame, allowing the curtain to be pulled completely off the glass. However, even with a good rod, you will still have a small gap at the top between the rod and the ceiling. You can fix this with a valance or a fabric cornice board mounted above the window.
Blackout Curtain Hardware: The Overlooked Details
People spend a fortune on blackout fabric and then hang it on a flimsy spring rod, ruining the entire effect. The hardware matters just as much as the curtain.
- Screw-in hooks: Use wall anchors and screws to install the brackets. Suction cups and adhesive clips will not hold the weight of heavy blackout panels.
- Return brackets: These are angled brackets that hold the curtain rod away from the wall and curve back at the ends. They push the curtain flush against the wall, eliminating the side gap.
- Grommet or back-tab tops? Grommets (the metal rings) are easy to slide but allow a little light through the holes. Back tabs (fabric loops on the back) hide the rod completely and seal better, but they are more difficult to slide. For sliding doors, consider a hybrid: panels with hidden tabs or a track system where the top of the fabric is sealed, Once your new window treatments are finalized, ensure structural perfection by learning what happens when windows and doors are installed.
Light Leakage: Places You Forgot to Check
Even with the best curtains, light finds its way in. Understanding where it leaks helps you solve the problem. The four primary leak points are the top, the sides, the middle, and the bottom.
The Top: Light spills over the rod. Fix this with a cornice board (a wooden box that covers the hardware) or a custom valance attached directly to the ceiling. Alternatively, use a track mounted as close to the ceiling as possible—within 2 inches.
The Sides: Standard rods have finials that stop the curtain 2–3 inches from the wall. Return brackets solve this. In a track system, the track curves back to the wall, closing the gap completely.
The Middle: Two panels often don’t overlap enough. When you buy multiple panels, ensure they have extra width so they overlap by at least 4–6 inches in the center. Use a curtain clip to pin them together if necessary.
The Bottom: If the curtain floats an inch off the carpet, light floods in. Let the curtain puddle on the floor, or add tiny weights to the hem to keep it down.
Additional Benefits: Insulation and Noise Reduction
While the primary goal is blocking light, blackout curtains are multi-functional. The heavy, dense fabrics used to block light also act as a thermal barrier. In the summer, they can reduce heat gain through the glass by up to 33%, lowering your air conditioning costs. In the winter, they trap heat inside, keeping the room warmer. The same density that blocks light also absorbs sound. If your sliding door faces a noisy street, these curtains will noticeably dampen the noise, making the room feel calmer and more private.
Furthermore, these curtains offer UV protection. The fabric blocks the sun’s rays that cause furniture, carpets, and artwork to fade. By blocking UV light, you are extending the life of everything else in the room.
Frequently Asked Questions
Should blackout curtains be wider than the sliding door?
Yes, they should be significantly wider. The curtain rod or track should extend 8–12 inches beyond the door frame on each side. This allows the fabric to stack completely off the glass, maximizing light entry when open, and ensures the curtain seals properly against the wall when closed.
How many panels do I need for a sliding glass door?
For a standard 72-inch sliding door, you typically need two panels that are 54–60 inches wide each, or three narrower panels. The total combined width of the panels should be at least 1.5 times the width of the track to ensure proper fullness and overlap.
Can I use vertical blinds instead of blackout curtains?
Vertical blinds can block light, but they often rattle in the breeze and leave gaps between the slats. They are also less effective at thermal insulation. Blackout curtains provide a continuous fabric barrier that outperforms blinds in light blocking, insulation, and sound dampening.
Will blackout curtains make my room too dark during the day?
Yes, they will. True blackout curtains eliminate almost all external light. If you want flexibility, use a two-layer system: a sheer curtain paired with a blackout curtain on a double rod. This allows you to enjoy natural light with privacy, or full darkness when needed.
How do I wash blackout curtains?
Check the manufacturer’s label. Most triple-weave polyester curtains can be machine washed in cold water on a gentle cycle and hung to dry. Avoid using a dryer unless the label specifies it, as heat can warp the coating on cheaper blackout fabrics. Iron on low if needed, but avoid direct heat on coated fabrics.
Conclusion
Selecting the right blackout curtains for sliding doors is about more than picking a dark color. It requires a systems approach—measuring the full wall width, investing in the appropriate track or heavy-duty rod, and ensuring the fabric has enough fullness to remain gathered. Start with the measurements, then move to the material. A triple-weave fabric on a ceiling track is the most effective combination for eliminating light leakage and maximizing thermal comfort. Be prepared for the fact that you may need to buy more fabric than you initially expect—fullness is the difference between a functional blackout system and a flat piece of cloth that lets light shine around it. Once you seal those four leak points—top, bottom, sides, and middle—you will turn that giant glass wall from a nuisance into a polished, functional feature of your room.