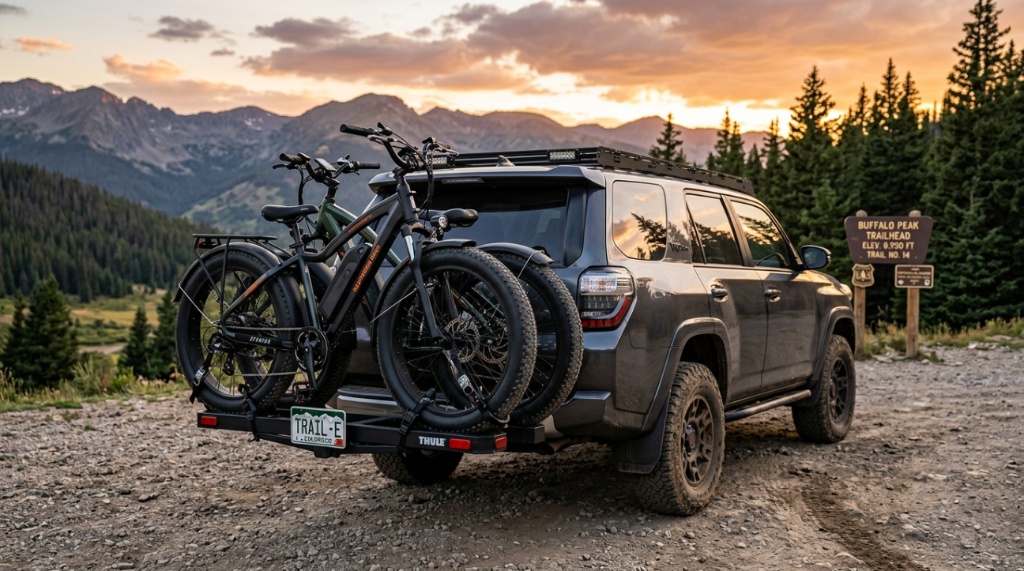
You finally pulled the trigger on a fat tire bike. It’s built for snow, sand, and trails that would swallow a standard mountain bike whole. But now you’re staring at your vehicle’s hitch and realizing the rack that worked for your road bike isn’t going to cut it. Fat tire bikes are heavier, wider, and bulkier than almost anything else you can strap to a car. Choosing the wrong hitch carrier for fat tire bikes can mean scratched paint, damaged frames, or worse—a bike bouncing down the highway behind you. This guide breaks down exactly what to look for, what to avoid, and how to match a carrier to your specific bike and vehicle setup.
Why Fat Tire Bikes Need a Different Hitch Carrier
Fat tire bikes aren’t just regular bikes with wider tires. They typically weigh between 30 and 40 pounds, with some electric fat bikes pushing 60 pounds or more. The tires themselves are usually 3.8 to 5 inches wide, which means standard bike rack cradles and wheel trays simply won’t accommodate them. Most conventional hitch racks are designed around tire widths of 2.0 to 2.5 inches and weight limits of 35 to 50 pounds per bike.
Beyond the physical dimensions, fat bikes have shorter chainstays and wider bottom brackets. That changes how the frame sits in a cradle and how the wheels align in a tray. A rack that works for a standard mountain bike can put awkward pressure on a fat bike’s frame, especially carbon models. The result is a rack that either doesn’t fit at all or creates a safety risk.
Weight Capacity Matters More Than You Think
Check the per-bike weight rating, not just the total rack capacity. Many racks advertise a 120-pound total capacity, but that’s split across two or more bikes. If you’re hauling a single 45-pound electric fat bike, you need a rack rated for at least 50 to 60 pounds per bike. Also factor in accessories like fenders, racks, or bags you might leave attached. A bike that weighs 40 pounds empty can easily hit 50 pounds with gear.
Tire Width Limits Are Non-Negotiable
Every hitch rack has a maximum tire width specification. For fat bikes, you need a rack that accepts at least 4.0-inch tires, ideally 4.8 to 5.0 inches for the widest models. Some racks come with adjustable wheel trays or straps that can be repositioned to handle wider tires. Others have fixed cradles that simply won’t work. Measure your actual tire width before shopping—don’t rely on the bike manufacturer’s spec, because aftermarket tires can be wider than stock.
Key Features to Look For in a Fat Bike Hitch Carrier
Not all hitch racks are created equal when it comes to hauling fat bikes. Focus on these specific features to narrow down your options.
Frame Clamp Design and Adjustability
The frame clamp is the part that holds your bike’s top tube or down tube. Fat bikes often have thicker tubes than standard bikes, especially at the down tube. Look for a clamp with a wide jaw opening and rubberized padding that won’t mar the frame. Some racks use a hook-and-strap system that wraps around the frame, which can be more forgiving for unusual tube shapes. Others use a ratcheting arm that locks down over the top tube. Make sure the clamp arm is long enough to reach over a thick fat bike frame.
Wheel Straps and Cradles
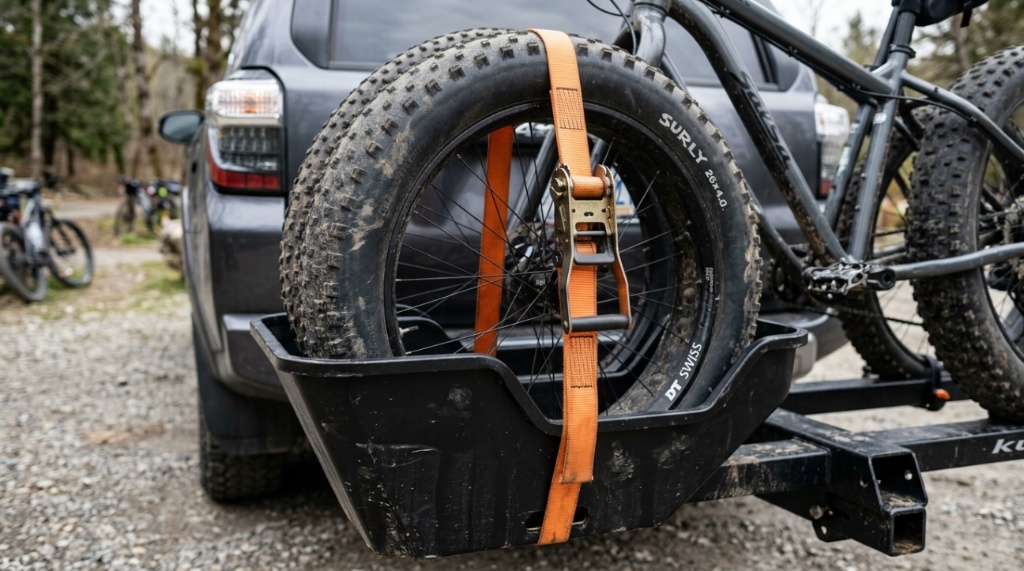
If the rack uses wheel trays, check whether the straps are long enough to wrap around a 4-inch-wide tire. Standard straps are often too short. Some racks have ratcheting wheel straps that can be adjusted to accommodate wider tires. Others use a simple hook-and-loop strap that may not provide enough tension for a heavy fat bike. Also check the tray width—some trays are too narrow to accept fat bike tires at all.
Hitch Class and Tongue Weight
Your vehicle’s hitch class determines what rack you can use. A Class I hitch (1.25-inch receiver) has a lower tongue weight rating, typically around 200 pounds. A Class II or III hitch (2-inch receiver) can handle more. Most fat bike racks require a 2-inch receiver because of the added weight and leverage of the bikes. If you have a 1.25-inch receiver, you’ll need an adapter, but be aware that adapters reduce stability and can increase sway. Some manufacturers make fat bike racks specifically for 1.25-inch receivers, but they usually have lower weight limits.
Platform vs. Hanging Racks for Fat Bikes
There are two main styles of hitch carriers: platform racks and hanging racks. For fat bikes, the choice is usually clear, but it’s worth understanding the trade-offs.
Platform Racks: The Safer Choice
Platform racks support the bike by its wheels, so the frame doesn’t bear the weight during transport. This is ideal for fat bikes because it avoids putting pressure on the frame, especially if you have a carbon or aluminum frame with delicate tubing. Platform racks also keep the bike more stable at highway speeds because the center of gravity is lower. The downside is that platform racks are heavier, bulkier, and more expensive. They also require more clearance behind your vehicle, which can be an issue on steep driveways or off-road trails,To ensure your ride stays completely stable during transport, read our guide on how to secure-heavy-ebikes-hitch-rack before hitting the highway.
Hanging Racks: Lighter but Riskier
Hanging racks suspend the bike by its top tube. They’re lighter, cheaper, and easier to store, but they’re not ideal for fat bikes. The frame clamp can damage thick or oddly shaped tubes, and the bike swings more at speed. Hanging racks also have lower weight limits, so they may not support heavier electric fat bikes. If you have a lightweight aluminum fat bike and a short drive, a hanging rack might work, but it’s not the recommended choice for regular use.
How to Match a Hitch Carrier to Your Specific Fat Bike
Before you buy anything, measure your bike and check your vehicle’s hitch specifications. Here’s a practical checklist to work through.
- Weigh your bike: Use a luggage scale or bathroom scale to get the actual weight, including any accessories you’ll leave on.
- Measure tire width: Use a caliper or ruler to measure the widest part of the tire, not the rim.
- Check frame tube diameter: Measure the top tube and down tube where a clamp would sit. Fat bikes often have tubes that are 35mm or thicker.
- Verify hitch class and receiver size: Look at the label on your hitch receiver or measure the opening. A 2-inch receiver is standard for most SUVs and trucks.
- Check your vehicle’s tongue weight rating: This is usually listed in the owner’s manual. The rack plus bikes must stay under this limit.
- Consider ground clearance: A platform rack adds several inches behind your vehicle. If you have a steep driveway or take your vehicle off-road, measure the departure angle.
Common Mistakes to Avoid
One of the most common mistakes is buying a rack based on the bike’s wheel size rather than tire width. A fat bike with 26-inch wheels still needs a rack that accommodates 4-inch-wide tires. Another mistake is assuming that a rack with a high total weight capacity can handle a single heavy bike. Always check the per-bike rating. Finally, don’t forget about the distance between the rack and your vehicle’s rear hatch or tailgate. Some racks tilt or fold down to allow access, but not all do. If you need to open your trunk with bikes loaded, look for a rack with a tilt feature.
Real-World Scenarios: Which Rack Fits Your Situation?
Different riders have different needs. Here’s how to match a rack to your typical use case.
Weekend Trailhead Runs
If you’re driving to local trails on weekends, you want a rack that’s easy to load and unload. A platform rack with a tilt feature is ideal because you can access your trunk without removing the bikes. Look for a rack with tool-free installation and foldable arms for storage. You don’t need the heaviest-duty option, but you do want something that won’t rattle or sway on the highway.
Long-Distance Road Trips
For cross-country trips or hauling bikes to a destination, stability is critical. Choose a platform rack with anti-wobble hardware and a higher weight rating than you think you need. Consider a rack with integrated locking mechanisms to secure both the rack to the hitch and the bikes to the rack. Also check the rack’s warranty and customer support reputation, because a failure far from home is a major inconvenience.
Electric Fat Bikes
Electric fat bikes are the heaviest category, often exceeding 60 pounds. You need a rack rated for at least 70 to 80 pounds per bike. Look for a platform rack with reinforced wheel trays and heavy-duty straps. Also consider the added torque on your hitch—an electric fat bike on a platform rack can put significant stress on a Class I hitch. If you have a 1.25-inch receiver, you may need to upgrade to a 2-inch hitch before hauling an e-fat bike.
Installation and Safety Tips
Once you’ve chosen a rack, proper installation is just as important as the rack itself. Follow these steps to ensure a safe trip.
- Insert the rack into the hitch receiver: Make sure it’s fully seated and the pin or bolt is secured.
- Tighten the anti-wobble mechanism: Most racks have a bolt or cam that eliminates play between the rack and the receiver. Tighten it until the rack doesn’t move.
- Load the heaviest bike first: Place the heaviest bike closest to the vehicle to reduce leverage on the hitch.
- Secure the frame clamp: Position the clamp on the top tube or down tube, avoiding cables and brake lines.
- Strap the wheels: Use the wheel straps to secure both tires to the tray or cradle. Tighten until there’s no movement.
- Check all connections: Give the bike a firm shake to test for movement. Re-tighten any loose straps or clamps.
- Test drive: Drive a short distance and then re-check all connections. Vibrations can loosen straps that seemed tight.
Maintenance and Storage
Hitch racks take a beating from weather, road salt, and UV exposure. Rinse the rack after trips, especially if you’ve driven through salty or sandy conditions. Lubricate moving parts like tilt mechanisms and anti-wobble bolts periodically. Store the rack indoors when not in use, or use a cover to protect it from the elements. Check the straps and clamps for wear before each trip—replacement parts are often available from the manufacturer.
If you’re still weighing options and want to see how different models compare for various vehicle types and Florida-specific conditions, this hitch carrier for fat tire bikes guide offers additional context on popular choices and regional considerations.
Frequently Asked Questions
Can I use a regular bike rack for a fat tire bike?
Most regular bike racks cannot accommodate fat tire bikes because the wheel trays are too narrow and the weight limits are too low. You need a rack specifically designed for tires wider than 3.8 inches and a per-bike weight capacity of at least 50 pounds.
What is the maximum tire width for a hitch carrier?
It depends on the specific rack model. Some platform racks accept tires up to 5.0 inches wide, while others max out at 4.0 inches. Always check the manufacturer’s specification before purchasing.
Do I need a 2-inch hitch receiver for a fat bike rack?
Most fat bike racks require a 2-inch receiver because of the added weight and leverage. Some models offer a 1.25-inch option, but they typically have lower weight limits and may be less stable with heavy bikes.
Can I leave my fat bike on the rack while driving on rough roads?
Yes, but you should check all straps and clamps before driving and periodically during long trips. Rough roads can loosen connections, so it’s important to use a rack with secure locking mechanisms and to re-tighten as needed.
How do I know if my hitch can handle the weight of a fat bike rack?
Check your vehicle’s owner’s manual for the tongue weight rating. This is the maximum downward force your hitch can handle. Add the weight of the rack plus the weight of all bikes, and make sure the total is below the rating.
Conclusion
Choosing the right hitch carrier for fat tire bikes comes down to three things: weight capacity, tire width compatibility, and hitch class. Measure your bike, check your vehicle’s specifications, and prioritize a platform-style rack if you’re hauling heavier or electric fat bikes. Avoid the temptation to save money with a hanging rack if you plan to use it regularly—the risk of frame damage and instability isn’t worth it. Once you’ve selected a rack, install it carefully, secure your bike properly, and check everything before every trip. With the right setup, you can throw your fat bike on the back of your vehicle and head to the trails with confidence.